
Wondering how to do a full WordPress backup?
The easiest way to do a full backup is by using a plugin that takes care of all the technical details.
The plugin I recommend for backups is called UpdraftPlus Backup and Restoration. https://wordpress.org/plugins/updraftplus/
It’s a free plugin available in the WordPress.org plugin repository. Look it up by searching on the keyword Updraft or UpdraftPlus.
Once you have the plugin installed, go ahead and activate it then go to the Settings page.
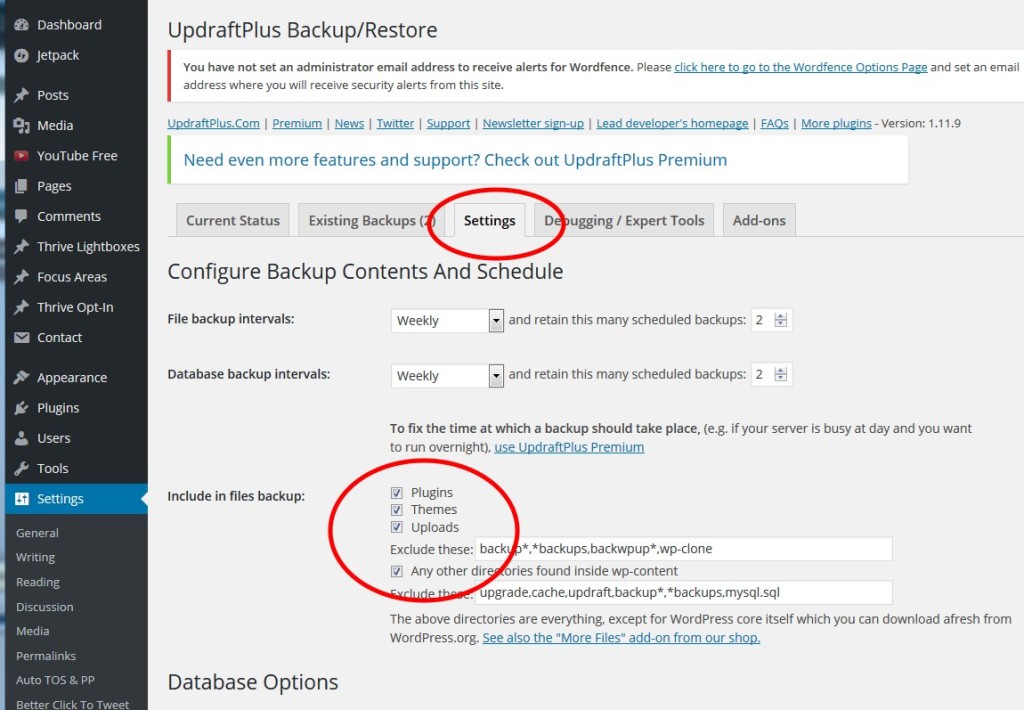
On the UpdraftPlus settings page, look for a series of tabs – click the one that says Settings. This is where you can configure everything.
Start by setting the frequency of your backups. I recommend weekly for most businesses I work with. If you post frequently – like daily, then choose a more frequent backup schedule.
Note that you should set the same frequency for both file backups and database backups.
Also, leave the setting for how many backups to retain set at 2. This way, if you get hacked or something and don’t realize it for a week, then you’ve still got a clean backup you can use.
Next, set the files to include in your backup. I always include everything – this is what gives you a “full WordPress backup”
Tick the box under Reporting if you want an email delivered to your inbox every time a backup runs. I actually do this and although it does get annoying seeing all the emails come in every week, it makes it easy for me to see if there were any problems with the backup.
Finally, you need to specify the remote storage location for your backups. You don’t have to specify one actually – you can just have backups emailed to you in .zip files or you can manually download them and store them where you want.
But the beauty of this plugin is that you can do a full WordPress backup on autopilot and it just saves to one of your cloud drives. This way, even if your computer goes down, you still have a complete backup when you need it!
I prefer Dropbox for my storage. Choose the one that you want and then follow the directions to get it set up. Make sure that you scroll down and Save Settings after you choose a remote location. Then come back and follow the directions from there for setting up your storage.
In my case, I chose Dropbox as the remote storage, then clicked to save. Then I go back to the Settings tab, scroll down and then I click the link to authenticate Dropbox – which basically is just me signing in and then allowing Dropbox access.
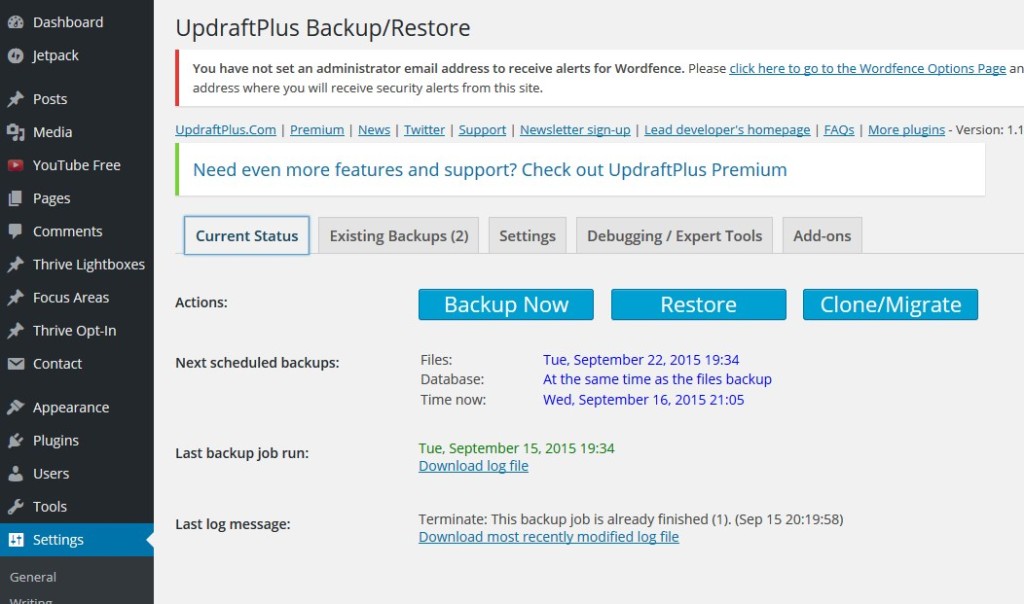
Once that is done go back to the Current Status tab in UpdraftPlus. On this page, you should be all set to click the blue button that says Backup Now. From now on your backups will run each and ever week (or whatever period you chose). It’s pretty slick.
That’s it!